
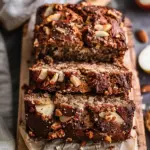
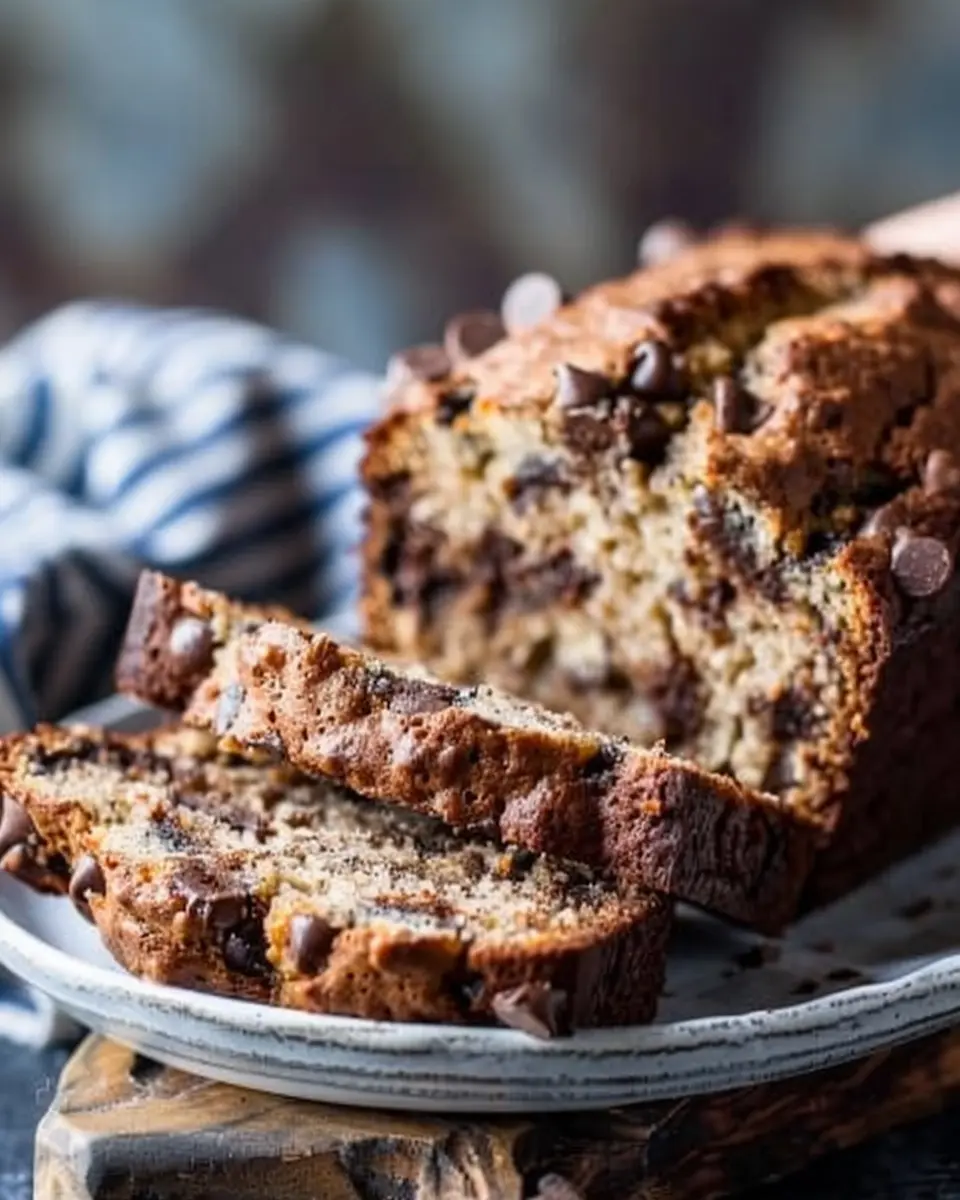
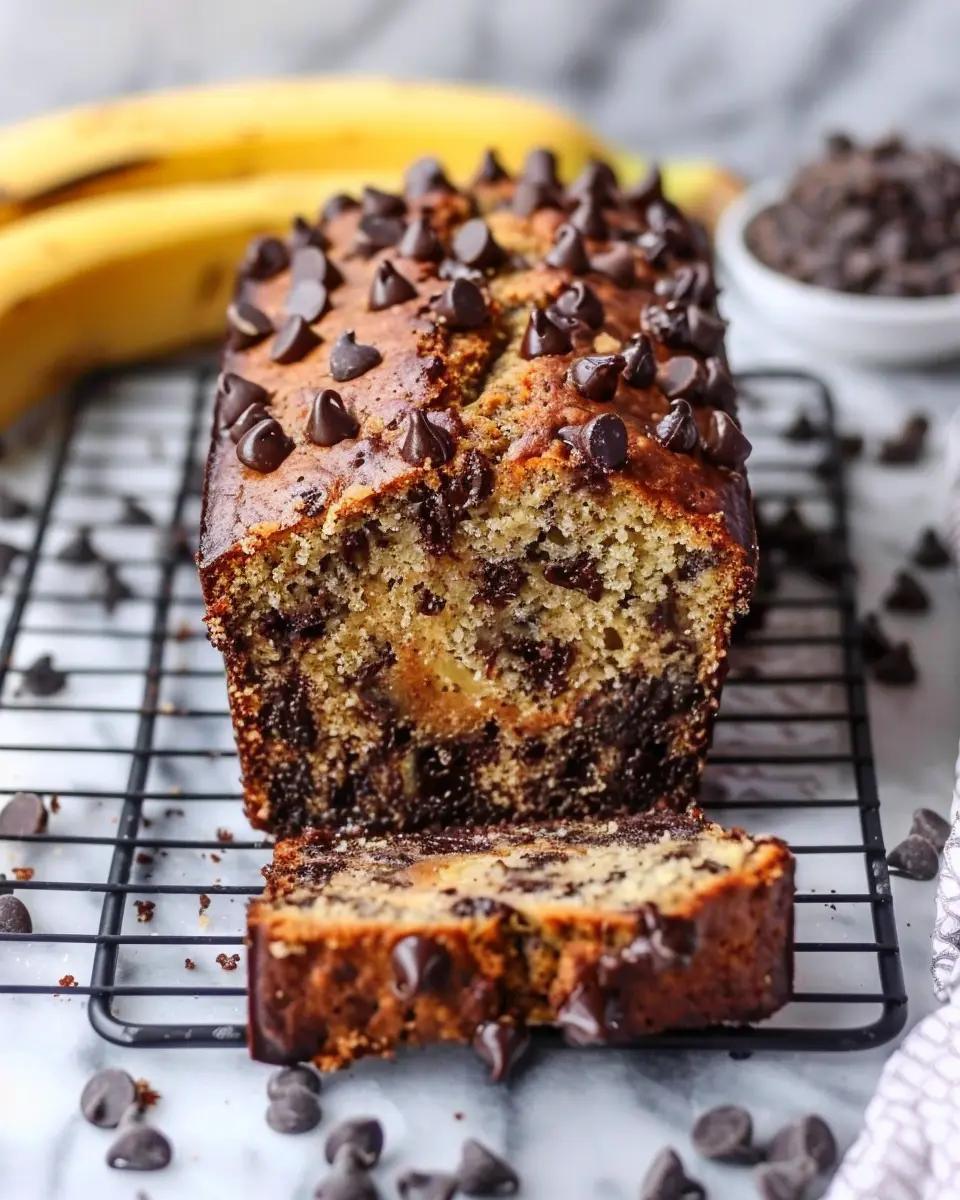
Introduction to Apple Bread
When life gets hectic, and your calendar fills with deadlines and demands, finding time for comfort food can be challenging. That’s where apple bread comes in. This delightful baked treat is more than just a sweet indulgence; it’s the perfect solution for busy professionals seeking both nourishment and a moment of joy in their day.
Why Apple Bread is the Perfect Homemade Treat for Busy Professionals
Consider this: after a long day at work, the last thing you want to do is spend hours in the kitchen. Apple bread simplifies cooking with its straightforward preparation process. Most recipes require just one bowl and a few basic ingredients, meaning less cleanup and more time to relax. You can whip it up during the weekend and enjoy it throughout the week—an essential reason why it’s a go-to for many.
Notably, apple bread is versatile. You can enjoy it plain, spread with a touch of butter, or even topped with a dollop of cream cheese. The natural sweetness of the apples, combined with cinnamon and nutmeg, offers a warm, comforting flavor that can brighten even the most stressful of days. Curious to know more about enhancing your breads? Great resources like the American Institute of Baking provide insights on baking techniques that can elevate your culinary creations.
Nutritionally, adding fruit to your diet has been linked to numerous health benefits, including boosted energy levels and improved mood. According to a study published in the Journal of Nutrition, individuals who consume more fruits and vegetables tend to experience a greater sense of well-being. So, not only does your homemade apple bread taste heavenly, but it’s also a step toward healthier eating.
If you’re wondering about how long your apple bread will last, rest assured! It can be stored at room temperature for up to three days, or in the refrigerator for even longer freshness. You might find yourself reaching for those slices during busy workdays, or as a sweet snack after dinner.
In essence, making apple bread isn’t just about baking; it’s about creating a little slice of comfort to savor amidst our fast-paced lives. So, let’s dive into the recipe and bring sweetness to your week!
Ingredients for Apple Bread
Essential ingredients you’ll need for a delicious apple bread
Creating mouthwatering apple bread begins with gathering those essential staples. Here’s what you’ll need to achieve that perfect blend of sweet and savory:
- Fresh apples: Opt for tart varieties like Granny Smith or Honeycrisp to balance the sweetness.
- All-purpose flour: This forms the base of your bread and provides the perfect texture.
- Sugar: Depending on your taste, granulated or brown sugar can add richness.
- Baking powder: Essential for that lovely rise.
- Eggs: These bind everything together while adding moisture.
- Cinnamon: A must for that warm, comforting flavor.
- Vanilla extract: Enhances the overall taste and aroma.
- Vegetable oil or butter: These fats keep your bread moist and tender.
Optional toppings to elevate your apple bread experience
Once your apple bread is baked to perfection, consider dressing it up with some optional toppings:
- Chopped nuts: Walnuts or pecans add a delightful crunch.
- Icing: A simple glaze made of powdered sugar and milk can add a sweet touch.
- Fresh fruits: Slices of apple on top bring extra visual appeal.
- Whipped cream: Perfect for those who can’t resist a creamy finish.
With these ingredients and toppings, you’re well on your way to baking a scrumptious apple bread. For more inspiration, check out King Arthur Baking for tips on enhancing your baked goods. Happy baking!
Preparing Apple Bread
Making apple bread at home isn’t just about combining ingredients; it’s an experience filled with warmth and delightful aromas. Let’s walk through the steps to prepare this delightful treat that will surely impress family and friends!
Preheat the oven and prepare the loaf pan
Before you get your hands mingling with the flour, it’s essential to preheat your oven to 350°F (175°C). Preheating sets the stage for even baking. While that’s warming up, grab your loaf pan—an 8×4 inch pan works perfectly. Lightly grease it with butter or cooking spray, or you can even line it with parchment paper for easy removal later. This ensures your apple bread doesn’t stick and maintains its beautiful shape when baked.
Toast the walnuts for enhanced flavor
Next, let’s awaken the flavor of those walnuts! Toasting enhances their natural oils and brings out a deeper, nuttier taste in your apple bread. Simply spread the walnuts on a baking sheet and pop them in the oven (you can do this while it’s preheating). About 5-7 minutes should do the trick. Keep a close eye to avoid burning. Once aromatic, let them cool before chopping—I promise you’ll notice the difference in the final flavor!
Mix the dry ingredients for a perfect base
In a large mixing bowl, combine your dry ingredients: flour, baking powder, baking soda, salt, and a hint of cinnamon. Cinnamon not only gives a warm flavor but is also packed with antioxidants, making your apple bread not just tasty but somewhat healthy as well. Use a whisk to mix them thoroughly; this aerates the mixture and ensures even distribution, preventing any surprises in texture later on.
Combine the wet ingredients seamlessly
In another bowl, mix together your wet ingredients: unsweetened applesauce, eggs, and granulated sugar. For a twist, consider adding a splash of vanilla extract or Greek yogurt for moisture. The applesauce adds a natural sweetness while helping to keep the bread moist. Whisk until fully combined, and don’t be shy about getting those arms moving—this is your moment to infuse some energy into the mix!
Create the batter by bringing dry and wet ingredients together
Now comes the fun part: bringing the two bowls together! Gradually add your dry mixture to the wet ingredients. Fold gently using a spatula or wooden spoon, being careful not to overmix. A few small lumps are perfectly fine. You’re aiming for a batter that’s somewhat thick yet pourable. If you’re here looking for the best techniques, check out these baking tips from the experts to refine your skills.
Fold in the apples and walnuts
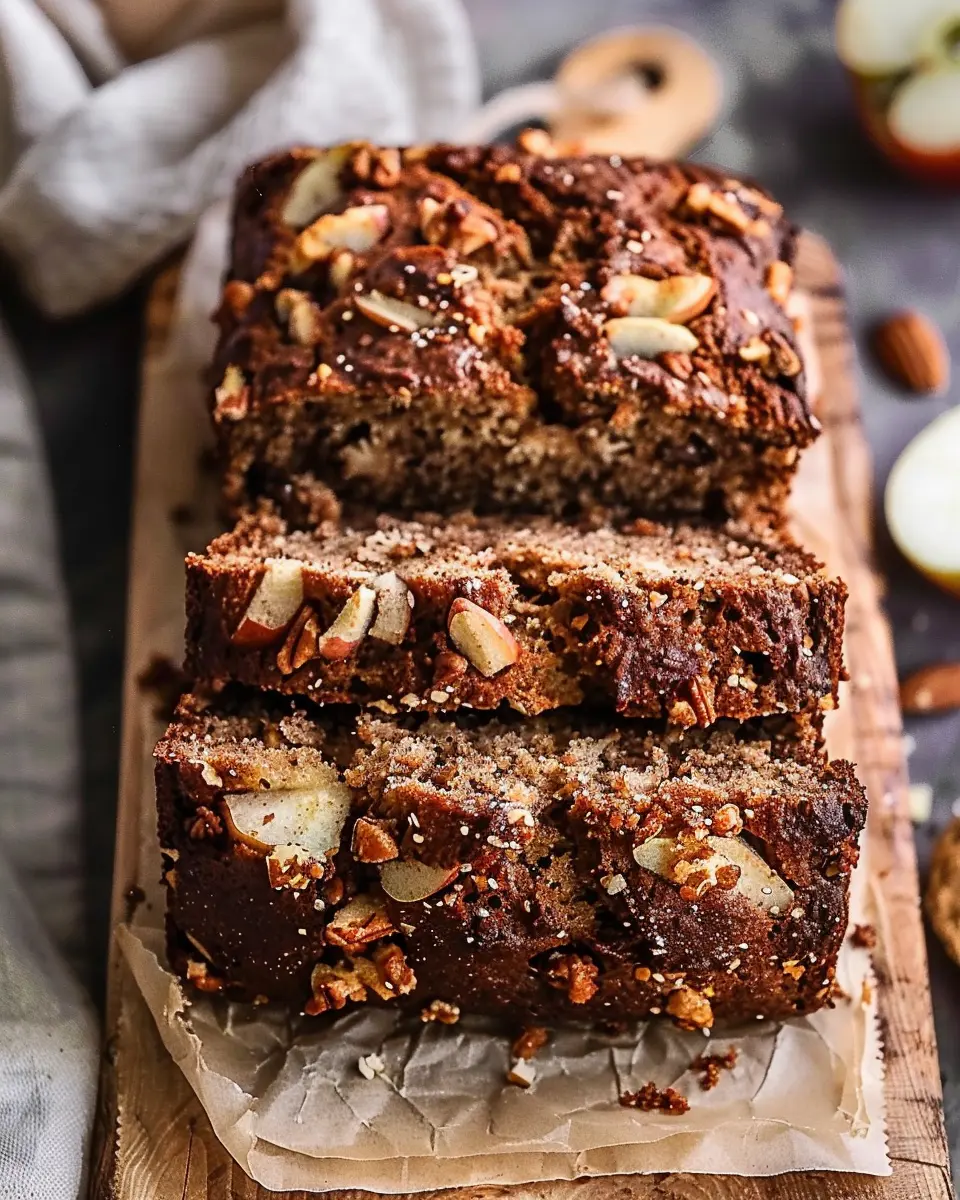
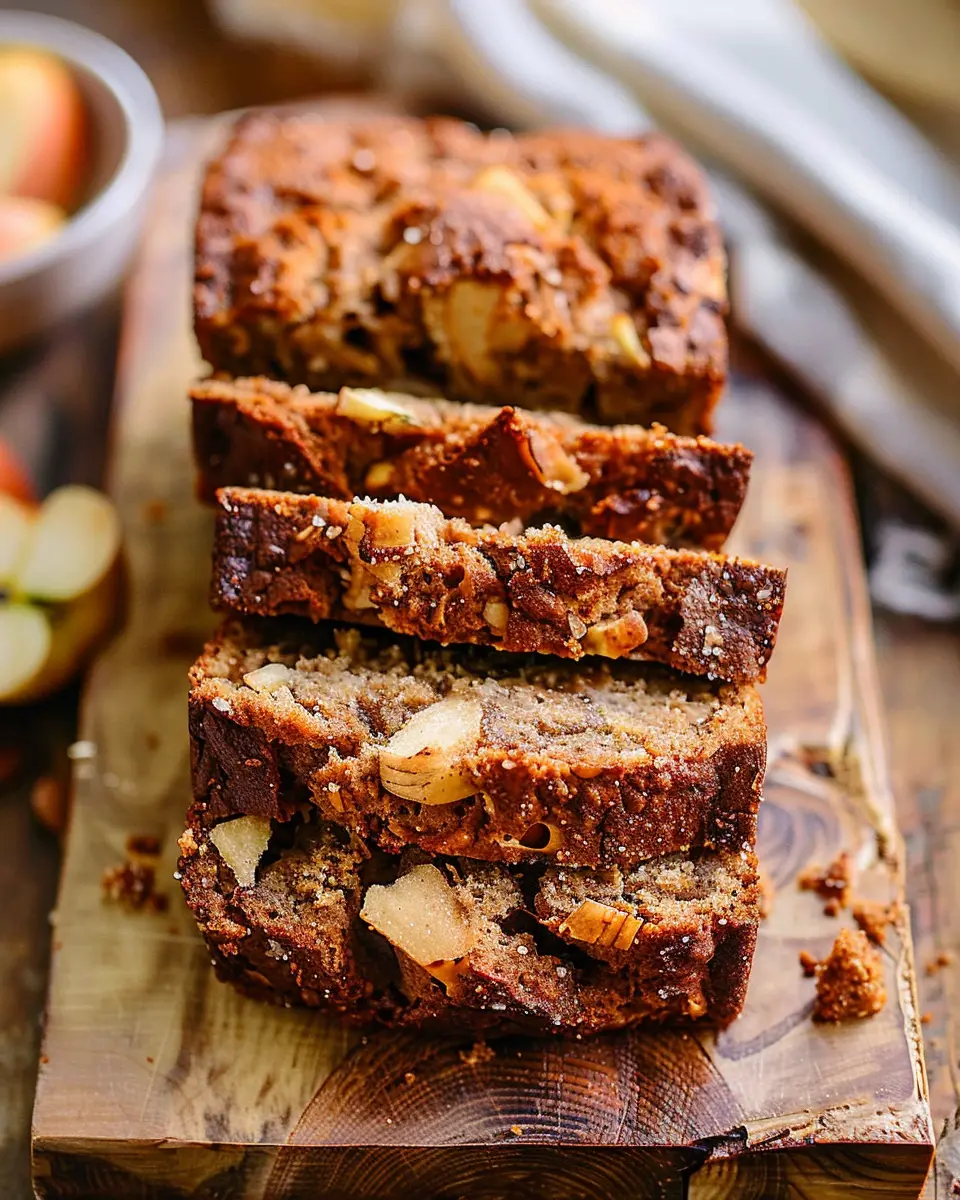
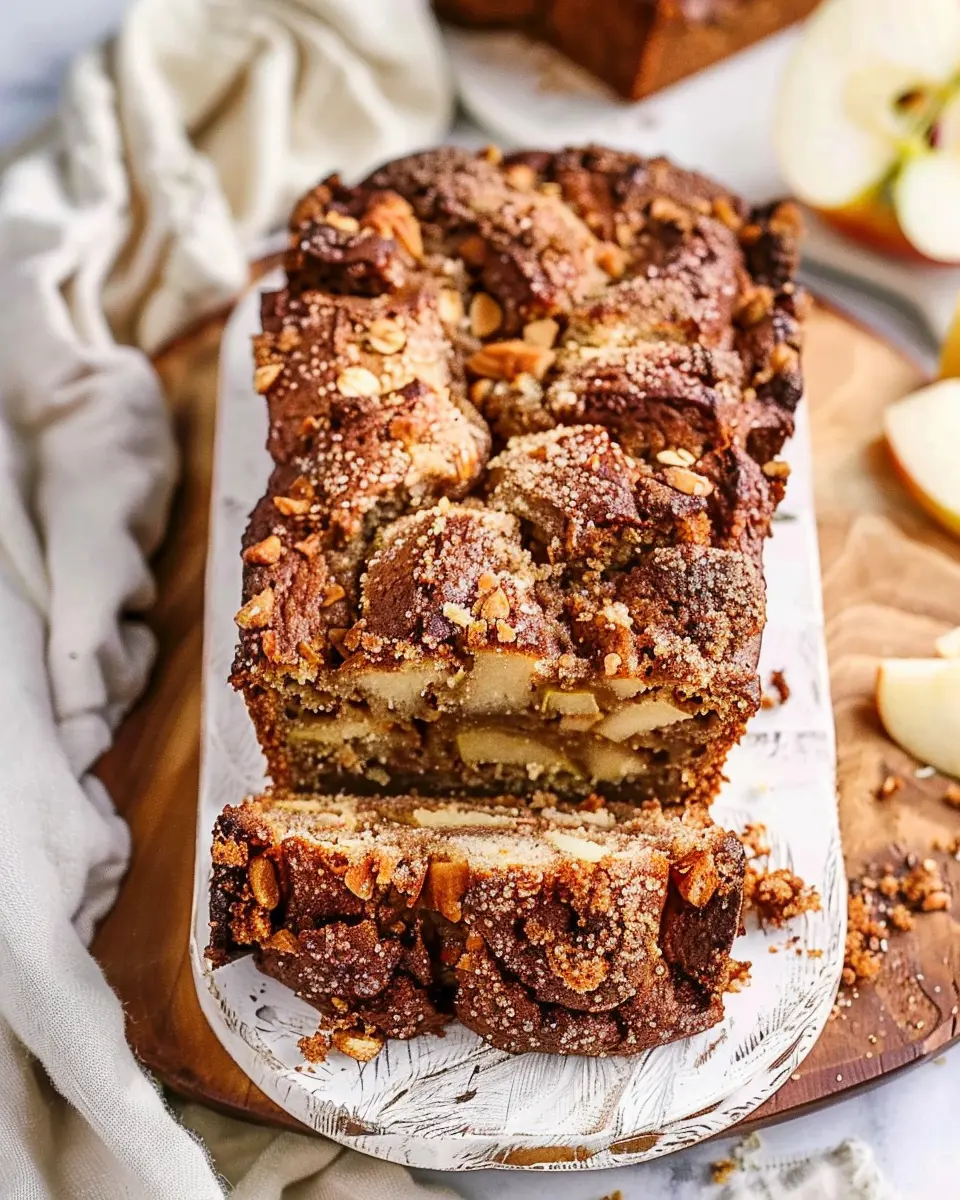
Next, it’s time to fold in those freshly diced apples and toasted walnuts. Make sure you use crisp, juicy apples like Granny Smith or Honeycrisp—they add a wonderful texture and flavor. Gently combine them into the batter until evenly distributed. This step is where the real magic happens; your apple bread is about to burst with flavor!
Pour the batter into the prepared pan
Carefully pour your batter into the prepared loaf pan. Use a spatula to spread the mixture evenly, ensuring it reaches the corners of the pan. Some bakers love to sprinkle a little extra cinnamon or sugar on top for a crunchy crust—feel free to try that out!
Bake and enjoy the aroma
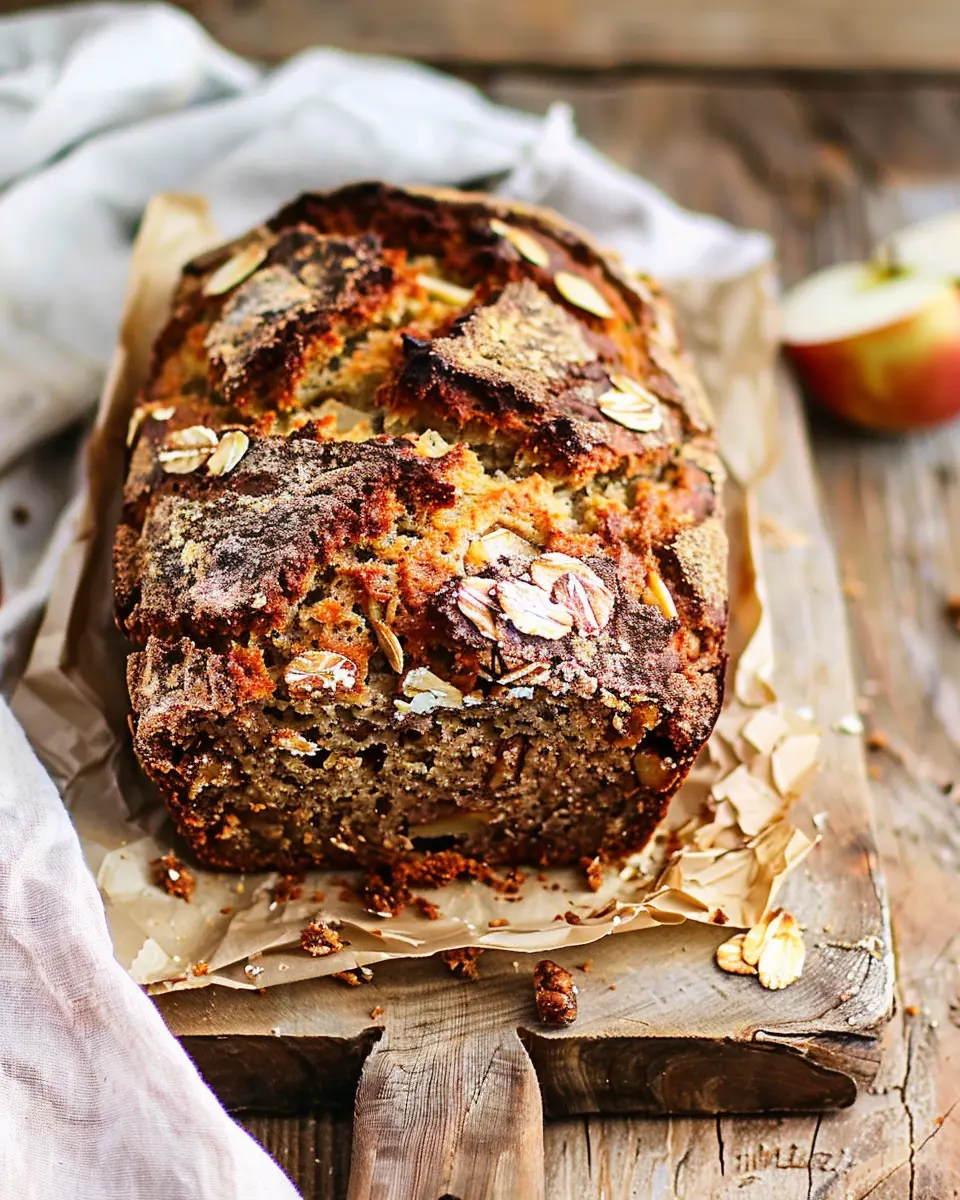
Now it’s time to sit back, relax, and let your oven do its magic. Place the pan in the center rack of your preheated oven and bake for 50-60 minutes. You’ll know it’s done when the top is golden brown and a toothpick inserted into the center comes out clean. As the apple bread bakes, your kitchen will be filled with an irresistible aroma. Seriously, is there anything better than the smell of fresh bread?
Let it cool in the pan for about 10 minutes before transferring it to a wire rack. The wait is the hardest part, but trust me—it’s worth it!
With these steps, you’re all set to make the best apple bread that will leave everyone craving another slice. Enjoy your delicious creation!
Variations on Apple Bread
Apple Cinnamon Bread for a Cozy Twist
If you’re in the mood for something even cozier, try adding a dash of cinnamon to your apple bread. This delightful variation brings warmth and sweetness that wraps around you like a favorite sweater. Incorporate about a teaspoon of ground cinnamon into your dry ingredients, and consider swirling a cinnamon-sugar mixture into the batter before baking for a gorgeous presentation. Not only does this enhance the flavor profile, but it also fills your kitchen with an irresistible aroma that makes everyone eager to take a slice.
Gluten-Free Apple Bread for Health-Conscious Bakers
For those mindful of gluten, fear not! You can still enjoy delicious apple bread with a gluten-free twist. Substitute traditional flour with a high-quality gluten-free flour blend—these can often be found at your local grocery store or specialty shops. Don’t forget to add a binding agent, like xanthan gum, to ensure your bread maintains its delightful texture. Using oats or almond flour can also enrich the flavor and provide added health benefits.
Vegan Apple Bread Using Plant-Based Alternatives
Are you looking for a vegan option? You can easily adapt your apple bread recipe by replacing eggs with flaxseed meal or applesauce, which not only keeps the bread moist but also adds natural sweetness. Opt for almond milk or any plant-based milk of your choice instead of dairy. This version is perfect for anyone following a plant-based lifestyle, and you won’t sacrifice flavor for dietary restrictions.
For more tips on crafting the perfect apple bread, check out resources like Food52 or America’s Test Kitchen. Each variation brings its unique flair to this classic treat, ensuring there’s something for everyone!
Cooking Tips and Notes for Apple Bread
Common pitfalls and how to avoid them
Baking apple bread can be a delightful experience, but it’s easy to run into a few common pitfalls. One major issue is using too much liquid, which can lead to a dense and soggy bread. Be sure to measure your apples accurately and consider using firm varieties like Granny Smith. Also, pre-peeling and chopping your apples help release their moisture prior to mixing. Additionally, avoid overmixing your batter—this can activate the gluten and yield a tough texture. Keep it gentle for the best results.
Expert tips for achieving perfect texture and flavor
For that ultimate apple bread flavor, remember to toast your nuts before adding them into the mix; this enhances their nuttiness and adds depth. Don’t shy away from spices! Ground cinnamon and nutmeg elevate the flavor profile beautifully. Try swapping out regular granulated sugar with brown sugar for a moister loaf, and don’t forget to let your apple bread cool in the pan for about 10 minutes before transferring it to a wire rack. Looking for more tips? Check out this resource on baking science for a deeper understanding of how these elements work together.
Serving Suggestions for Apple Bread
Pairing apple bread with your favorite spreads
One of the simplest joys of homemade apple bread is how versatile it is when it comes to spreads. Whether you’re in the mood for something sweet or savory, there’s an option for you:
-
Cream Cheese: A rich, tangy cream cheese spread complements the sweetness of the apple bread beautifully. You can even jazz it up with a hint of cinnamon or honey.
-
Nut Butters: Almond or peanut butter adds a nutty depth that pairs nicely with the fruitiness. It’s a satisfying choice for a mid-morning snack.
-
Apple Butter: For an extra apple kick, slather on some apple butter. It’s a match made in heaven!
Creative ways to enjoy apple bread at brunch
Brunch is the perfect occasion to serve apple bread, adding a delightful twist to your spread. Here are some ideas to elevate your brunch game:
-
French Toast: Transform leftover apple bread into delicious French toast. Top with maple syrup and fresh fruit for a decadent start to your day.
-
Toast Bar: Set up a DIY toast bar featuring your apple bread alongside toppings like Greek yogurt, granola, and seasonal fruits. It’s interactive and fun!
-
Savory Pairings: Serve with sides like Turkey Bacon or Chicken Ham for a balance of flavors that keeps everyone satisfied.
If you’re looking for more inspiration, check out these creative brunch ideas or find unique spreads at this gourmet store. Enjoy your apple bread experience!
Time Breakdown for Apple Bread
Preparation Time
Making apple bread is a delightfully quick process! You’ll want to set aside about 15 to 20 minutes for preparation. This includes gathering your ingredients, peeling, and chopping the apples, and mixing everything together. It’s a great time to put on your favorite music and enjoy the cozy atmosphere of baking.
Baking Time
Once your mixture is ready and in the oven, expect a baking time of around 50 to 60 minutes. This is where the magic happens—the sweet aroma of apple and spice will fill your kitchen, making it hard to resist checking back for a sneak peek!
Total Time from Start to Finish
In total, you’re looking at about 1 hour and 15 minutes from start to finish. Perfect for a weekend kitchen project or a weekday dessert to impress your friends. With this time breakdown, you’ll be well on your way to creating a scrumptious loaf of apple bread. For more insights on cooking times, check out resources like the Food Network for additional recipes!
Nutritional Facts for Apple Bread
Estimated Calorie Count
On average, a slice of apple bread contains about 180-210 calories, depending on the specific ingredients used. If you’re trying to keep track of your calorie intake, it’s always good to consider your portion sizes. Baking your own version allows you to enjoy a delicious treat while better controlling the nutritional content.
Key Nutritional Benefits of Apple Bread
Apple bread isn’t just a tasty treat; it also brings a variety of nutritional benefits to the table:
- Rich in Fiber: Apples are a great source of dietary fiber, which aids digestion and can help keep you feeling full longer.
- Vitamins & Minerals: Apples provide essential vitamins like Vitamin C, along with potassium, important for heart health.
- Low in Fat: This bread can be low in fat, especially if you opt for healthier oil or yogurt alternatives when baking.
- Natural Sweetness: Using apples allows you to reduce added sugars, making it a more wholesome choice.
Incorporating apple bread into your diet can be a delightful and nutritious experience. For more on the health benefits of apples, check out resources from Healthline. Enjoy this delicious blend of flavors and health with every slice!
FAQs about Apple Bread
How can I ensure my apple bread turns out moist?
A common concern when baking apple bread is achieving that perfectly moist texture. Here are some tips to keep your loaf luscious and delicious:
- Use fresh apples: Fresh, juicy apples are essential. Opt for varieties known for their moisture, like Fuji or Gala.
- Add applesauce: Incorporating a bit of applesauce into your batter can enhance moisture without adding too much fat.
- Don’t overmix: Mix your ingredients just until combined. Overmixing can lead to a denser texture.
If you follow these simple steps, you’re on your way to a fabulously moist loaf!
What apples are best for apple bread?
When choosing apples for your apple bread, you want to combine flavors and textures. Some great choices include:
- Granny Smith: Their tartness balances the sweetness of the bread.
- Honeycrisp: These apples provide a delightful sweetness with a crisp bite.
- Jonathan: Known for their robust flavor, these add depth to your every slice.
Want to know more about apples? The USDA Agricultural Research Service provides in-depth information on various apple types and their flavors.
Can I add other fruits or nuts to the recipe?
Absolutely! Experimenting is part of the fun in the kitchen. Here are some excellent additions to your apple bread:
- Nuts: Walnuts or pecans add a crunch that contrasts beautifully with the soft bread.
- Dried fruits: Consider raisins or cranberries for extra sweetness and chew.
- Zucchini or carrots: Adding grated veggies provides moisture and a nutritious boost.
Whether you opt for these variations or stick to the classic recipe, your apple bread is sure to impress!
Conclusion on Apple Bread
Recap of the Joys of Making and Enjoying Homemade Apple Bread
There’s something deeply satisfying about baking your own apple bread. The aroma envelops your kitchen, evoking warmth and comfort, perfect for any season. The simple process allows for creativity—adjusting spices, adding nuts, or even swapping in Turkey Bacon for a savory twist.
As you slice into that fluffy, moist loaf, imagine sharing it with friends or enjoying it during a cozy night in. Homemade treats not only taste better but also nurture a sense of accomplishment. So, gather those apples and take your kitchen adventure to the next level! For more baking tips, check out King Arthur Baking for inspiration.
PrintApple Bread Delight: A Simple and Indulgent Homemade Treat
A delicious and easy recipe for homemade apple bread that is perfect for breakfast or a snack.
- Prep Time: 15 minutes
- Cook Time: 70 minutes
- Total Time: 85 minutes
- Yield: 1 loaf
- Category: Dessert
- Method: Baking
- Cuisine: American
- Diet: Vegetarian
Ingredients
- 3 cups all-purpose flour
- 1 teaspoon baking soda
- 1/2 teaspoon baking powder
- 1 teaspoon ground cinnamon
- 1/2 teaspoon salt
- 1/2 cup unsalted butter, softened
- 1 cup granulated sugar
- 2 large eggs
- 1 teaspoon vanilla extract
- 2 cups peeled and chopped apples
- 1/2 cup walnuts, chopped (optional)
Instructions
- Preheat your oven to 350°F (175°C) and grease a loaf pan.
- In a bowl, whisk together the flour, baking soda, baking powder, cinnamon, and salt.
- In a separate bowl, beat together the butter and sugar until light and fluffy.
- Add eggs one at a time, mixing well after each addition, then stir in the vanilla.
- Gradually add the dry ingredients to the wet ingredients, mixing until just combined.
- Fold in the chopped apples and walnuts, if using.
- Pour the batter into the prepared loaf pan and smooth the top.
- Bake for 60-70 minutes, or until a toothpick inserted in the center comes out clean.
- Allow to cool in the pan for 10 minutes, then transfer to a wire rack to cool completely.
Notes
- For added sweetness, consider adding a cup of raisins or dried cranberries.
- This bread can be served warm or at room temperature.
Nutrition
- Serving Size: 1 slice
- Calories: 215
- Sugar: 12g
- Sodium: 150mg
- Fat: 9g
- Saturated Fat: 4g
- Unsaturated Fat: 4g
- Trans Fat: 0g
- Carbohydrates: 32g
- Fiber: 1g
- Protein: 3g
- Cholesterol: 37mg
")