
Introduction to Chocolate Thumbprint Cookies
What are Chocolate Thumbprint Cookies?
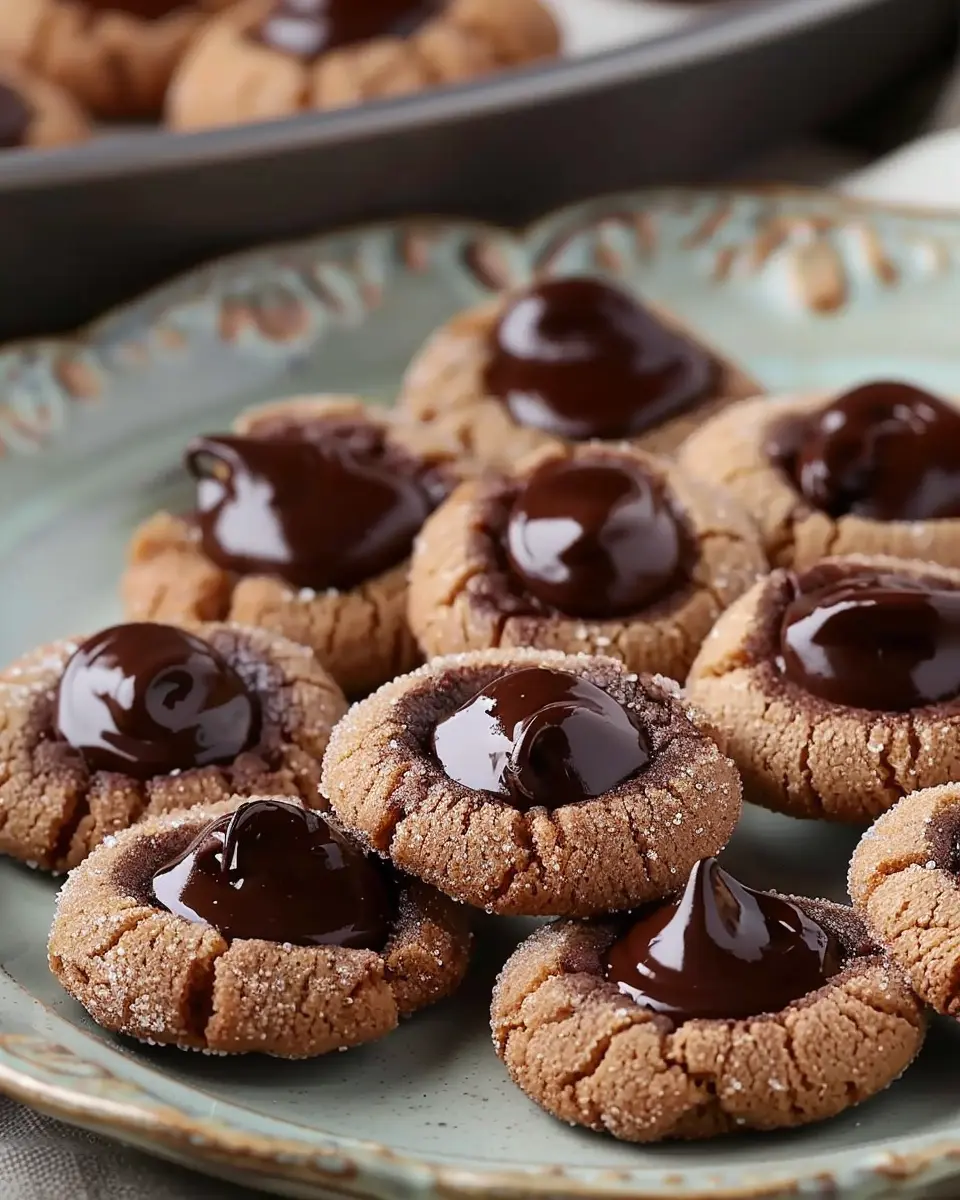
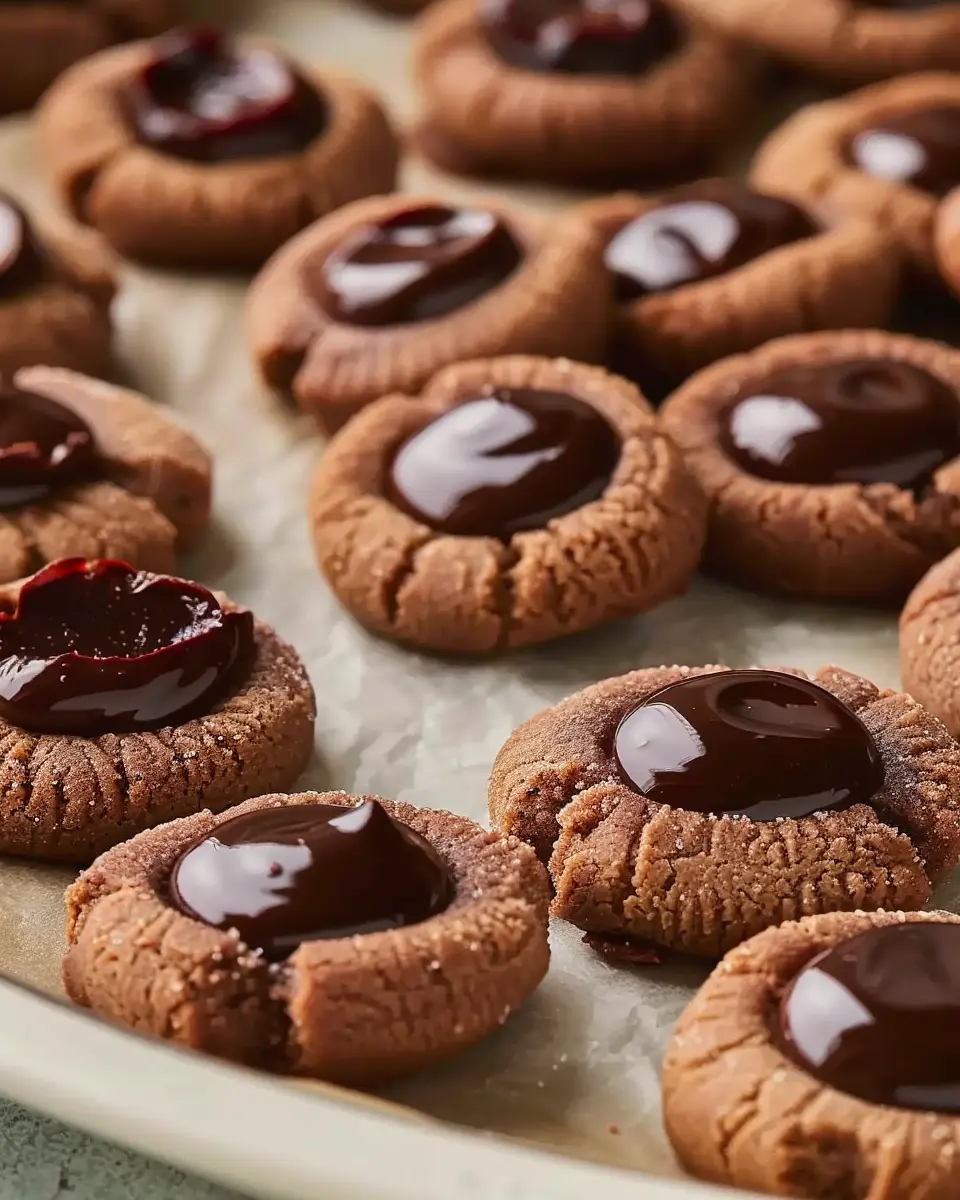
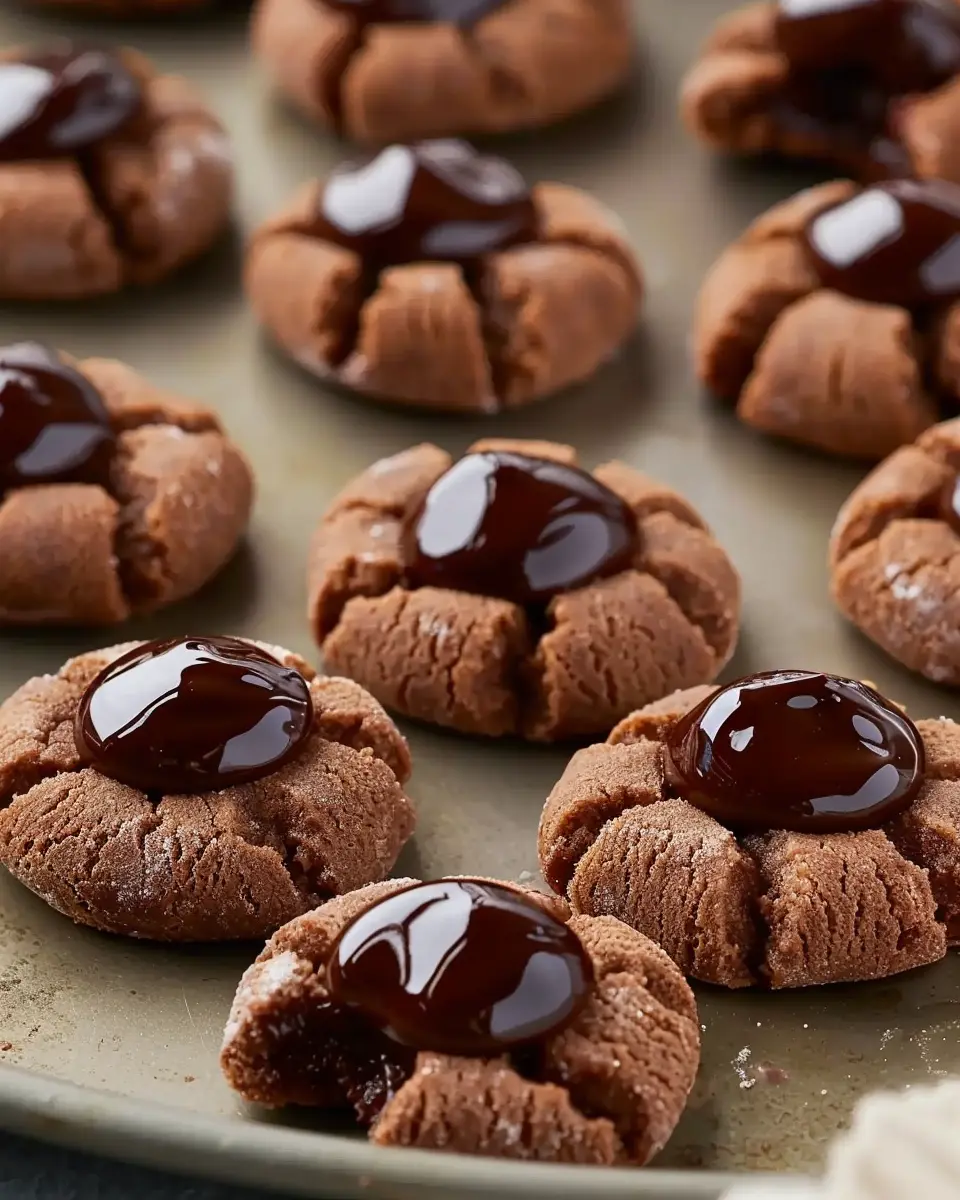
Chocolate Thumbprint Cookies are delightful little treats characterized by a rich, chocolatey base and that distinctive thumbprint in the center, which is often filled with sweet toppings like jam, ganache, or even Nutella. These cookies are not only easy to make but also deliver a wonderful blend of textures — a slightly crisp outer layer and a soft, chewy inside. Whether you’re a baking novice or a seasoned pro, Chocolate Thumbprint Cookies are the perfect way to impress friends and family while satisfying your sweet tooth.
A Personal Story About Discovering Thumbprint Cookies
The first time I tasted thumbprint cookies was at a friend’s holiday gathering. I was instantly captivated by their unique shape and the luscious filling. I remember stepping into the kitchen, drawn in by the sweet smell of chocolate wafting through the air, only to find a platter of perfectly baked thumbprint cookies, glistening with a rich chocolate glaze. As I took my first bite, I was hit with a burst of flavor that made the bustling holiday chaos fade into the background. It was one of those unforgettable moments that made me realize the joy homemade cookies can bring. Since then, I’ve made these cookies countless times, experimenting with different fillings and sharing them with loved ones.
Why Homemade Cookies Are Worth the Effort
Baking cookies at home might seem like a chore, but trust me — it’s an experience worth savoring. Not only do homemade cookies surpass anything you can find at the store, but they also allow you to customize flavors to your liking. Plus, there’s something incredibly rewarding about pulling a tray of warm cookies out of the oven, the aroma filling your kitchen, and the anticipation of sharing them with others.
When you make Chocolate Thumbprint Cookies at home, you also control the quality of your ingredients. According to the American Heart Association, using natural sweeteners and high-quality chocolate can make your treats not only delicious but also a bit healthier. So, why not gather some friends, enjoy a baking session together, and create lasting memories with this versatile and delightful cookie recipe?
Ingredients for Chocolate Thumbprint Cookies
Essential ingredients for the base
When it comes to making Chocolate Thumbprint Cookies, the foundation is incredibly simple yet essential! Here’s what you’ll need for the cookie base:
- Unsalted Butter: 1 cup, softened, for richness.
- Granulated Sugar: 1/2 cup, to add sweetness and help with the texture.
- Brown Sugar: 1/2 cup, for that extra depth of flavor.
- All-Purpose Flour: 1 3/4 cups, to give the cookies structure.
- Cocoa Powder: 1/3 cup, because more chocolate means more happiness!
- Egg Yolk: 1 large, to bind everything together.
These ingredients create a delightful, chocolatey base that practically melts in your mouth.
What’s needed for the filling
Now, let’s not forget the star of the show—the filling! Here’s what you’ll need to bring your Chocolate Thumbprint Cookies to life:
- Chocolate Chips or Chunks: 1 cup, use semi-sweet or dark chocolate for a richer taste.
- Heavy Cream: 1/4 cup, to make the filling creamy and luscious.
This combination results in a deliciously gooey center that contrasts beautifully with the cookie’s crispy edges.
Alternative ingredient options
Need some substitutions? No problem! Here are a few alternatives to consider:
- Butter: You can use coconut oil for a dairy-free option.
- Sugar: Coconut sugar or maple syrup is a great natural alternative.
- Flour: Whole wheat flour can replace all-purpose for a healthier twist.
- Egg Yolk: Unsweetened applesauce works as an egg substitute if you’re vegan.
Exploring different ingredients allows for a unique twist on the classic Chocolate Thumbprint Cookies, making them perfect for everyone! For more inspiration, check out culinary blogs like Serious Eats or The Kitchn for creative alternatives. Happy baking!
Preparing Chocolate Thumbprint Cookies
Baking is an art, and there’s something particularly joyous about creating delicious treats like Chocolate Thumbprint Cookies. These little delights not only bring a smile to your face but also fill your kitchen with a scrumptious aroma. Let’s dive into the process of crafting these unbeatable cookies that are perfect for snacking or gifting.
Gather Your Ingredients
The first step in any successful baking endeavor is to assemble your ingredients. For Chocolate Thumbprint Cookies, you’ll need the following:
- 1 cup unsalted butter, softened
- 2/3 cup granulated sugar
- 2 large eggs
- 1 teaspoon vanilla extract
- 1 and 3/4 cups all-purpose flour
- 1/2 cup cocoa powder
- 1/2 teaspoon baking powder
- 1/4 teaspoon salt
- Your choice of filling (like jam, nut butter, or chocolate ganache)
Having everything at hand will make the baking process smoother and a lot more enjoyable. If you’re new to this, consider using a kitchen scale for precise measurements, as this can help improve the consistency of your cookies.
Cream the Butter and Sugar
Start by creaming the softened butter and granulated sugar together in a mixing bowl. You want them to be light and fluffy, which typically takes about 3-5 minutes of mixing. This is a crucial step, as it helps to incorporate air into your dough, resulting in cookies that are tender and delectable.
You might be wondering about the science behind this step. According to King Arthur Baking, creaming establishes the base for the cookie’s texture, which can influence everything from chewiness to crispiness.
Mix in the Egg and Vanilla
Once you’ve achieved that perfect fluffy texture, it’s time to add the eggs and vanilla extract. This mix not only enhances the flavor but also helps bind your ingredients.
Crack in the eggs one at a time, mixing well after each addition. Then stir in that fragrant vanilla extract. Just imagine how heavenly your kitchen will smell as the vanilla melds with the butter and sugar.
Combine Dry Ingredients
In a separate bowl, whisk together the all-purpose flour, cocoa powder, baking powder, and salt. This is an essential step, as even distribution of dry ingredients ensures that your cookies will bake evenly.
Gradually add this dry mixture to your creamed butter and sugar, mixing until just combined. Over-mixing at this stage can lead to tougher cookies—so be gentle!
Form the Dough Balls
Now the fun part begins: shaping your cookies! Roll the dough into small balls, about one inch in diameter. If you’re finding it sticky, a little dusting of flour on your hands can help.
To get your perfect Chocolate Thumbprint Cookies, use your thumb (or the back of a measuring spoon) to make an indent in the center of each ball. This is where all the delicious fillings will go later, making each bite a little surprise.
Bake the Cookies and Create Thumbprints
Preheat your oven to 350°F (175°C). Place your formed cookie balls on a baking sheet lined with parchment paper, leaving some space in between, as they will expand while baking.
Bake for about 10-12 minutes, and five minutes before they’re done, remove them from the oven. Press your thumb into the center again to redefine those indentations—you want them to hold that filling beautifully.
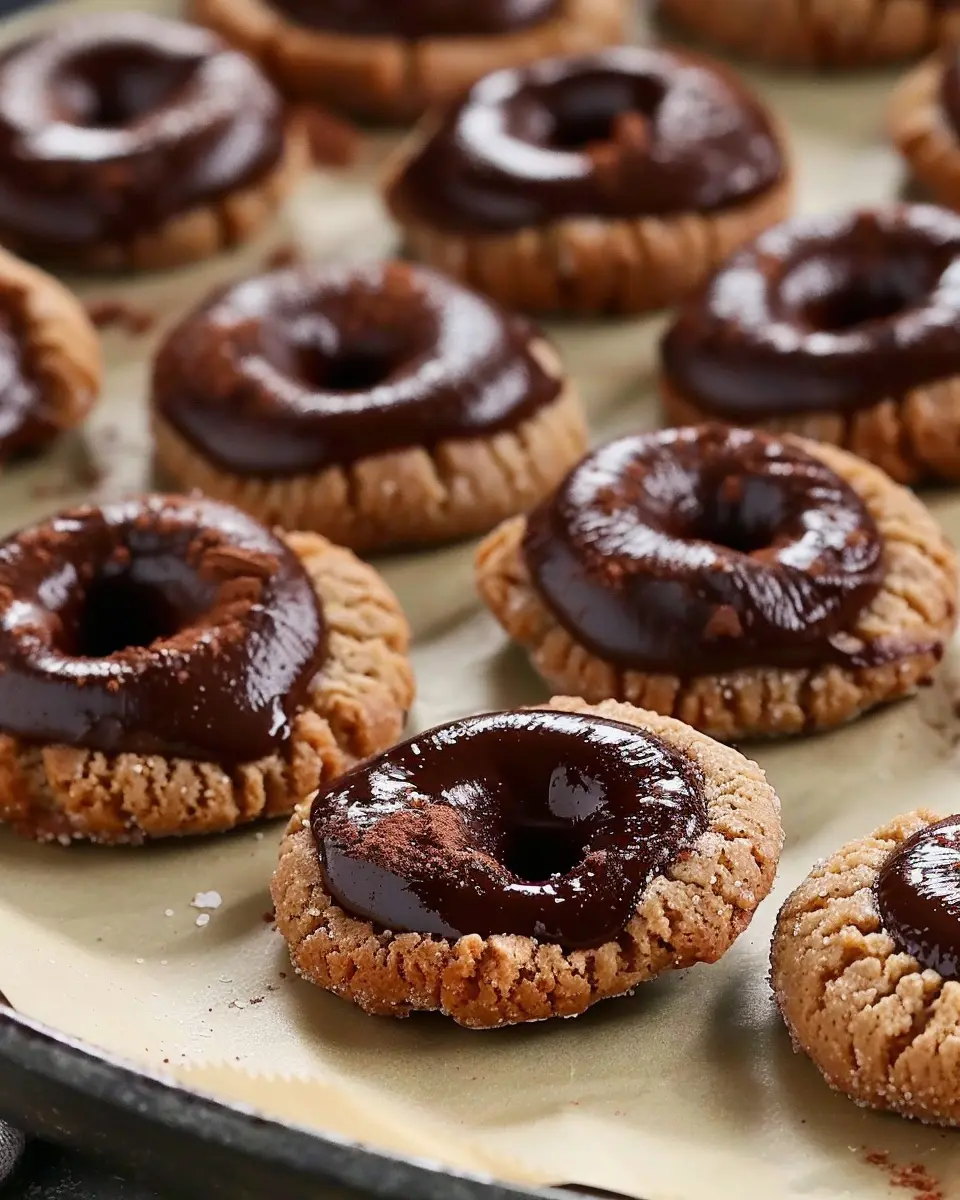
After baking, allow your cookies to cool before filling the thumbprints with your choice of deliciousness. Whether you go with classic fruit jam or a rich chocolate ganache, you’re sure to have a crowd-pleaser on your hands.
Now that you’ve got the essentials down, why not collect some friends, grab a cup of coffee, and enjoy your fresh Chocolate Thumbprint Cookies together? Happy baking!
Variations on Chocolate Thumbprint Cookies
Chocolate thumbprint cookies are versatile treats that can be altered to cater to your unique palate. Here are a few delightful variations to consider!
Nutty Chocolate Thumbprint Cookies
If you’re a fan of nuts, try adding your favorite variety to your chocolate thumbprint cookies. A sprinkle of finely chopped hazelnuts or walnuts not only enhances flavor but provides a satisfying crunch. You can incorporate nut butter into the dough for a creamy texture, or fill the thumbprint with luscious Nutella for an indulgent twist. Check out this recipe for a nut butter option that pairs perfectly!
Spicy Chocolate Thumbprint Cookies
For those who like a little kick, spicy chocolate thumbprint cookies are where it’s at! Infuse your dough with spices like cayenne pepper or even a dash of cinnamon. This slight heat can balance the sweetness of the chocolate, creating a unique flavor profile that is sure to impress. You might be surprised at how well spices can elevate your cookies. Just imagine biting into a chocolate cookie that warms you up from the inside out!
Vegan-Friendly Thumbprint Cookie Options
Eating plant-based? No problem! Vegan-friendly chocolate thumbprint cookies can easily be made without animal products. Use flax eggs or applesauce as a binding agent and swap out standard butter for coconut or vegan butter. Not only do these substitutions maintain the cookies’ deliciousness, but they also make them accessible to a larger audience. Interested? Check out this guide for more vegan baking tips!
These variations ensure that your chocolate thumbprint cookies can cater to any occasion, whether you’re hosting a gathering or enjoying a quiet night in!
Baking Notes for Chocolate Thumbprint Cookies
Tips for Achieving the Perfect Texture
To get that delightful melt-in-your-mouth texture synonymous with Chocolate Thumbprint Cookies, consider the following tips:
- Chill the dough: Refrigerating your dough for at least 30 minutes helps reduce spreading and results in a firmer texture.
- Don’t overmix: When combining the dough, mix just until the ingredients are incorporated. Overmixing can lead to tough cookies.
- Use high-quality chocolate: The filling is key. Opt for good-quality chocolate to enhance both flavor and texture.
Storage Tips for Freshness
Keeping your Chocolate Thumbprint Cookies fresh and delicious is simple!
- Airtight container: Store them in an airtight container at room temperature for up to a week.
- Freezing: For longer storage, freeze the cookies in a single layer, then transfer them to a zip-top bag for up to three months. Just allow them to thaw at room temperature before enjoying.
By following these handy baking notes, you’ll elevate your cookie game and ensure every bite is as delightful as the last. For more expert tips, check out resources like King Arthur Baking or Bon Appétit for further insights.
Serving suggestions for Chocolate Thumbprint Cookies
Ideal pairings with beverages
When enjoying your Chocolate Thumbprint Cookies, consider pairing them with a warm beverage for a comforting experience. A rich cup of hot cocoa can enhance the chocolate flavor, while a smooth cup of coffee will contrast beautifully with the sweetness. If you’re looking for something a bit different, try a fragrant chai tea; its spices pair wonderfully with the cookie’s chocolate and jam fillings.
Creative presentation ideas
Presentation can elevate your Chocolate Thumbprint Cookies from simple treats to delightful party favorites. Try arranging them on a colorful platter, adding some fresh mint leaves or edible flowers for a pop of color. Alternatively, stack them in a clear glass jar tied with a ribbon—it makes for a lovely gift or centerpiece. For a fun twist, sprinkle some sea salt on top of the cookies before serving; this unexpected touch will surprise and delight your guests.
Ready to transform your cookie experience? Dive into these serving suggestions and make every bite memorable!
Time details for Chocolate Thumbprint Cookies
Preparation time
Making Chocolate Thumbprint Cookies is a delightful process that only takes about 15-20 minutes. Gather your ingredients, mix them up, and shape your cookies—it’s the perfect opportunity to turn on your favorite playlist and enjoy some kitchen therapy!
Baking time
These tempting treats require around 10-12 minutes in the oven. Keep an eye on them, as every oven behaves a little differently. You want them to be set at the edges but still soft in the center for that melt-in-your-mouth experience.
Total time
When you add it all together, you’re looking at about 30-35 minutes from start to finish. Perfect for a sweet treat without taking too much time out of your busy day!
For more tips on cookie baking, check out this expert guide on baking essentials. Remember, the best cookies are made with love and a sprinkle of patience!
Nutritional Information for Chocolate Thumbprint Cookies
Calories per cookie
If you’re wondering how many calories are hiding in those delightful Chocolate Thumbprint Cookies, each cookie packs around 100-120 calories. This makes them a sweet treat without going overboard.
Key Nutritional Components
When it comes to indulging in Chocolate Thumbprint Cookies, you’ll find some tasty nutritional benefits:
- Fats: Healthy fats from butter or coconut oil help keep the cookies moist and delicious.
- Carbohydrates: The sugars provide instant energy, perfect for an afternoon pick-me-up. However, moderation is key!
- Proteins: Depending on your recipe, you’ll often find a mix of flour and eggs, which contribute to the protein content.
These cookies can be enjoyed guilt-free, especially if you consider pairing them with a cup of coffee or tea for a delightful afternoon snack. Curious about making healthier choices? Check out resources on healthy baking at Harvard Health.
FAQs about Chocolate Thumbprint Cookies
Can I make these cookies in advance?
Absolutely! Chocolate thumbprint cookies are a fantastic make-ahead treat. You can prepare the dough and refrigerate it for up to three days before baking. Alternatively, if you’re looking to extend their shelf life, consider freezing the unbaked cookie dough. Just roll them into balls, place them on a baking sheet to freeze, then transfer to an airtight container. When you’re ready to bake, simply add a couple of extra minutes to the baking time.
What can I use instead of heavy cream?
If heavy cream isn’t on hand or you want a lighter option, there are several alternatives! Full-fat coconut milk is a great dairy-free substitute that can add a hint of coconut flavor. For a lower-calorie option, you might try using evaporated milk or a mixture of whole milk and a tablespoon of butter to mimic the richness of heavy cream. These substitutions won’t alter the delightful essence of your chocolate thumbprint cookies.
How do I store leftover cookies?
Storing your cookies properly ensures they stay delicious! Allow the cookies to cool completely before storing them in an airtight container at room temperature. They will stay fresh for about a week. If you want to keep them longer, consider placing them in the refrigerator, where they can last for up to two weeks. You can also freeze them; just make sure to layer them with parchment paper to prevent sticking.
For further reading, check out this guide on baking cookies for even more tips on baking and storing!
Conclusion on Chocolate Thumbprint Cookies
Recap of the Joys of Baking
Baking is not just about creating delicious treats—it’s a ritual that brings joy and warmth into our lives. From the rich aroma of melted chocolate to the satisfying moments of rolling dough, each step is a chance to unwind and connect with your kitchen. When you pull those Chocolate Thumbprint Cookies from the oven, the golden edges and gooey centers make all the effort worthwhile.
Encouragement to Try the Recipe
Now’s your chance to dive into baking these delightful cookies! Whether you’re looking to impress friends or simply treat yourself, this recipe is approachable and rewarding. So grab your ingredients and get ready to enjoy a delicious homemade experience. Happy baking, and don’t forget to share your creations with your loved ones! Want more inspiration? Check out The Kitchn for tips and tricks on perfecting your baking skills!
PrintChocolate Thumbprint Cookies: The Best Indulgent Treats for Home Bakers

Indulge in the rich goodness of chocolate thumbprint cookies, a delightful treat perfect for home bakers.
- Prep Time: 20 minutes
- Cook Time: 12 minutes
- Total Time: 32 minutes
- Yield: 24 cookies
- Category: Dessert
- Method: Baking
- Cuisine: American
- Diet: Vegetarian
Ingredients
- 1 cup unsalted butter
- 1 cup granulated sugar
- 1 teaspoon vanilla extract
- 2 cups all-purpose flour
- 1 cup cocoa powder
- 1/2 teaspoon salt
- 1/2 cup chocolate chips
Instructions
- Preheat the oven to 350°F (175°C).
- Cream together butter and sugar until smooth.
- Mix in vanilla extract.
- Gradually blend in the flour, cocoa powder, and salt.
- Shape dough into small balls and place on a baking sheet.
- Make an indentation in the center of each ball.
- Fill each indentation with chocolate chips.
- Bake for 10-12 minutes.
Notes
- Let cookies cool before serving.
- Store in an airtight container.
Nutrition
- Serving Size: 1 cookie
- Calories: 150
- Sugar: 10g
- Sodium: 50mg
- Fat: 8g
- Saturated Fat: 5g
- Unsaturated Fat: 2g
- Trans Fat: 0g
- Carbohydrates: 18g
- Fiber: 1g
- Protein: 2g
- Cholesterol: 30mg


")