
Introduction to Red Velvet Cookies
Whether you’re a busy young professional with a packed schedule or just someone who appreciates a delightful treat, red velvet cookies might be just what your sweet tooth is calling for. Imagine indulging in a soft, chewy cookie that combines the rich flavor of cocoa and hints of vanilla, all while presenting that iconic red hue. These cookies take dessert to the next level, offering not only flavor but a visual feast that’s perfect for sharing your culinary prowess with friends and colleagues.
Why are red velvet cookies the ultimate treat for young professionals?
Young professionals often juggle countless responsibilities, from work deadlines to social events, and navigating life’s many demands can be exhausting. That’s where red velvet cookies shine. Here’s why they might just be the ultimate treat for your busy lifestyle:
-
Quick and Easy to Make: With just a few simple ingredients, you can whip up a batch in no time. Not only does this make them a perfect pick-me-up after a long day, but it’s also an impressive recipe to share during potlucks or casual gatherings.
-
Perfect for Sharing: The vibrant color and unique flavor make these cookies a great conversation starter. Imagine surprising your co-workers with a platter of homemade treats at the office. They’ll not only be drawn to the stunning visuals but will also appreciate the effort you put in.
-
Balance of Taste and Fun: The classic red velvet flavor profile—chocolatey yet slightly tangy—hits all the right notes. Pair it with a cup of coffee or hot cocoa after a hard day; it’s almost therapeutic!
A 2019 study published in the “International Journal of Culinary Arts” emphasized that dessert enjoyment is essential for enhancing mood and reducing stress. So why not indulge in a delicious batch of red velvet cookies? If you’re curious about how to make them, stay tuned for the full recipe, where we break down everything you need—from ingredients to step-by-step instructions. This sweet treat could easily become a staple in your go-to dessert repertoire! For a deeper dive into baking basics, check out resources like Serious Eats or America’s Test Kitchen. Happy baking!

Ingredients for Red Velvet Cookies
Essential ingredients for the perfect red velvet cookies
Creating delectable red velvet cookies begins with gathering the right ingredients. Here’s what you’ll need to achieve that tender, chewy texture everyone loves:
- All-purpose flour: This forms the base.
- Granulated sugar: For sweetness and a touch of caramelization.
- Cocoa powder: Just a bit to enhance that rich, velvety flavor.
- Baking soda and baking powder: These leavening agents ensure your cookies rise beautifully.
- Salt: A pinch to balance the sweetness.
- Buttermilk: This adds moisture and that signature tang. You can also make a quick substitute with milk and vinegar if you’re in a pinch.
- Butter: Softened for a rich flavor and chewy texture.
- Vanilla extract: For depth and warmth.
- Red food coloring: The star of your red velvet cookies! Use as much or as little as you like to achieve that vibrant hue.
Substitutions you can make without losing flavor
Don’t have all the ingredients? No problem! Here are some easy substitutions that won’t compromise taste:
- Butter: You can use coconut oil or a plant-based butter for a dairy-free version.
- Buttermilk: Mix regular milk with a tablespoon of lemon juice or vinegar for a quick alternative.
- Sugar: Swap granulated sugar with brown sugar to add a hint of molasses.
Experimenting with these tweaks can make your baking experience more flexible and fun! For more tips on ingredient substitutions, check out this informative source. Happy baking!
Preparing Red Velvet Cookies
When it comes to indulging in sweet treats with a stunning flair, red velvet cookies steal the show. With their lush color and delightful taste, it’s no wonder these cookies are a favorite. Let’s walk through each step to create the perfect batch of these captivating confections!
Melt the butter to create a rich base
First things first—let’s set the foundation for our cookies by melting some butter. This step is crucial as it adds a rich flavor and ensures your red velvet cookies have a soft, chewy texture.
- Take ½ cup of unsalted butter and place it in a microwave-safe bowl.
- Melt it in the microwave in 20-30 second increments, stirring in between, until fully liquefied but not hot. This gentle heating will also help keep your cookie dough from becoming too crumbly later on.
Tip: If you have time, you can also consider browning the butter for an extra depth of flavor. Just watch it closely to avoid burning!
Combine wet ingredients for that vibrant flavor
Now it’s time to infuse our red velvet cookies with their distinctive taste. In a mixing bowl, combine:
- The melted butter
- 1 cup of granulated sugar
- 1 large egg
- 1 tablespoon of vanilla extract
- 1 tablespoon of buttermilk
- 2 tablespoons of red food coloring (the star player for that lovely hue)
Whisk these ingredients together until they create a smooth, glossy mixture. It’s where the magic begins! This combination not only enhances flavor but also brings that iconic red color to life. For a bit more on the benefits of buttermilk in baking, check out this article from King Arthur Baking.
Mix dry ingredients to ensure even texture
In a separate bowl, let’s tackle the dry ingredients. This step ensures that the leavening agents and other components are evenly distributed, so you get a consistent texture in every bite. Combine:
- 1 ½ cups all-purpose flour
- 1 tablespoon cocoa powder (not too much, just enough to bring the richness)
- 1 teaspoon baking soda
- ½ teaspoon salt
Whisk them together until well-blended. This is your foundational dry mix, which will provide the cookies with structure.
Fold the ingredients together without over-mixing
Now, it’s time to combine the wet and dry mixtures. Gently fold the dry ingredients into the wet mixture using a spatula. It’s important to do this carefully—over-mixing can lead to tough cookies. You want to stop mixing once you see no more flour streaks; a few lumps are totally fine!
Portioning and rolling cookies in red sanding sugar
For that extra crunch and a pop of color, we’re going to roll our cookie dough in lovely red sanding sugar. Here are the steps to follow:
- Use a cookie scoop or two tablespoons to portion out the dough.
- Roll each ball in the red sanding sugar until fully coated.
- Place them on a parchment-lined baking sheet, leaving enough space between each ball to allow for spreading.
Tip: If you prefer a more understated look, you can skip the sanding sugar. But let’s be real—who doesn’t love that extra razzle-dazzle?
Baking to perfection and the secret to chewy centers
Now for the best part—baking! Preheat your oven to 350°F (175°C) and bake for about 10-12 minutes. The secret to achieving those chewy centers? As soon as you see the edges starting to firm up but the centers still look a little soft, it’s time to take them out. They’ll continue to cook on the baking sheet as they cool down.
Let your red velvet cookies cool on the sheet for a few minutes before transferring them to a wire rack. This method preserves that lovely chewy texture while ensuring they’re not too firm.
With these steps, you’re well on your way to creating beautiful, delicious red velvet cookies that everyone will adore. Happy baking!
Variations on Red Velvet Cookies
Red velvet cookies are a delightful twist on the classic red velvet cake, and they provide endless opportunities for customizations that can take your cookie game to the next level. Let’s explore some fantastic variations that can cater to different tastes and dietary needs.
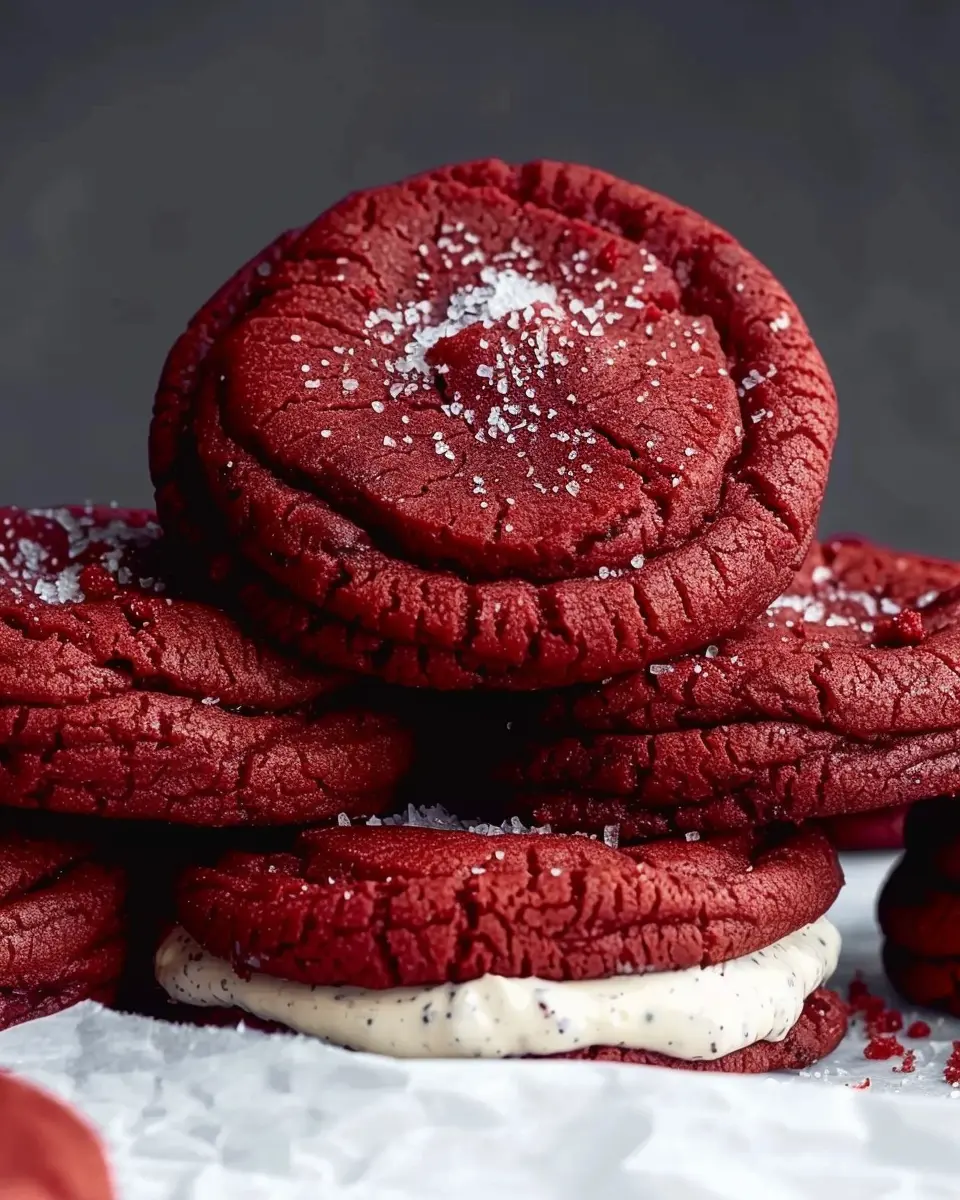
Red Velvet Cookies with Cream Cheese Filling
Imagine biting into a soft, chewy red velvet cookie only to discover a sweet and tangy cream cheese filling nestled in the center. This variation combines the rich flavor of red velvet with the classic pairing of cream cheese, creating an irresistible treat. To make these cookies:
- Prepare your favorite cookie dough.
- Form a small ball of dough and flatten it slightly, then place a dollop of cream cheese filling in the center.
- Encase the filling with more dough and roll it back into a ball before baking.
This method not only adds a creamy surprise but also elevates the flavor profile of your traditional red velvet cookies. If you want more inspiration, check out this cream cheese filling recipe for ideas.
Gluten-Free Red Velvet Cookie Options
For those looking to enjoy red velvet cookies without gluten, it’s entirely possible to adapt your recipe! Using a blend of gluten-free flour that includes almond and tapioca flour can yield delightful results. Here’s how to make them gluten-free:
- Substitute all-purpose flour with a gluten-free blend.
- Ensure all other ingredients (like baking powder and cocoa powder) are labeled gluten-free.
- Consider adding a bit of xanthan gum if your blend doesn’t include it to help bind the ingredients.
Many gluten-free enthusiasts rave about how delicious these cookies can be. In fact, recent studies show that the demand for gluten-free baking options has surged by 35% in the past five years. So, bring a batch to your next gathering and watch everyone enjoy them—gluten-free or not!
For a deeper dive into gluten-free baking, check out this gluten-free baking guide.
Experiment with these variations and let your creativity shine while delighting everyone with your red velvet cookies!
Baking Tips and Notes for Red Velvet Cookies
Common Pitfalls to Avoid While Baking
Baking red velvet cookies can be a delightful yet tricky endeavor if you’re not careful. Here are a few common pitfalls to steer clear of:
- Overmixing the Dough: This can lead to tough cookies. Mix until just combined for a tender bite.
- Incorrect Oven Temperature: Always preheat your oven. An oven thermometer can be invaluable here, as many home ovens are off by quite a bit.
- Not Using Quality Cocoa: Unsweetened cocoa powder that’s past its prime can dull the flavor of your red velvet cookies.
How to Achieve the Best Texture and Flavor Balance
To get that perfect texture and flavor, consider the following tips:
- Use Room Temperature Ingredients: Ensure your butter and eggs are at room temperature for a smooth batter.
- Add Chocolate Chips: Mixing in semi-sweet chocolate chips enhances the flavor and creates a captivating contrast with the cocoa.
- Employ Creaming Method: Creaming butter and sugar properly incorporates air, leading to fluffy cookies.
Remember, baking is as much science as it is art! For further baking wisdom, check out resources like King Arthur Baking for excellent tips and guidance. Happy baking!
Serving suggestions for Red Velvet Cookies
Perfect pairings: drinks and desserts to complement your cookies
When it comes to enjoying red velvet cookies, the right pairings can elevate your experience. Consider serving these indulgent cookies with a rich cup of coffee or a creamy hot chocolate to balance their sweetness. For a refreshing twist, try pairing them with a chilled glass of iced tea or lemonade. Both options provide a delicious contrast to the dense, velvety texture of the cookies.
If you’re in the mood for an evening treat, these cookies also go delightfully with a scoop of vanilla or cream cheese ice cream. The creamy texture enhances the soft, chewy cookies and creates a dessert experience that’s simply divine.
Creative ways to present cookies for gatherings or gifts
When you’ve baked a batch of red velvet cookies, how you present them can make all the difference. For gatherings, think about using a decorative cake stand to showcase your cookies. Layer them on and surround with festive decorations or edible glitter for an eye-catching display.
For gifts, consider packaging them in a charming mason jar or a small, elegant box tied with a ribbon. This not only makes your cookies look extra special but also adds a personal touch that friends and family will appreciate.
You can find some ideas for presentation styles here: The Chocolate Chip Cookie Blog or Cookie Gift Ideas.
Each of these suggestions ensures that your red velvet cookies become the highlight of any occasion!
Time details for Red Velvet Cookies
Preparation time
Getting ready to bake your red velvet cookies is a breeze, taking about 15 minutes. Make sure you have all your ingredients, like cocoa powder and buttermilk, ready to go. Preheating your oven during this time can streamline the process!
Baking time
Once you’ve shaped your cookies, they only need 10-12 minutes in the oven. Keep an eye on them; they’re done when the edges are set but the centers look a bit soft. This is the perfect moment to leave them!
Total time
All in all, you’re looking at approximately 30-35 minutes from start to finish. That’s just enough time to whip up a treat that’s not just tasty but also visually appealing. Enjoy your delightful red velvet cookies! For tips on storage and variations, check out resources like The Spruce Eats and Food Network to suit your cravings!
Nutritional Information for Red Velvet Cookies
When indulging in red velvet cookies, it’s good to know what you’re savoring. These delightful treats bring a symphony of flavors along with their nutritional profile.
Calories Per Serving
Each red velvet cookie typically contains around 150 calories. If you’re sharing (or not), these cookies can fit nicely into an average day’s caloric intake without too much guilt.
Sugar Content
With about 10 grams of sugar in each cookie, it’s wise to consider your overall sugar consumption—especially if you’re mindful of your sweet intake. For perspective, the American Heart Association recommends limiting added sugars to about 6 teaspoons for women and 9 for men daily.
Dietary Considerations
If you have dietary constraints, red velvet cookies can be tweaked. Opt for gluten-free flour for those with gluten sensitivities, or consider using natural sweeteners like coconut sugar. There are numerous recipes online that cater to different dietary needs—one great resource is Healthline. Always be curious about your options!
Deciding whether to indulge in a red velvet cookie should factor in your preferences and goals. Just remember, moderation is key!
FAQs about Red Velvet Cookies
When it comes to baking red velvet cookies, there are always questions that pop up. Here are some frequently asked questions to help you achieve cookie perfection!
How Do I Prevent My Red Velvet Cookies from Being Cakey?
If your red velvet cookies tend to turn out cakey, here are a few tips to remedy that:
- Adjust Baking Time: Cakey cookies often mean they’ve been in the oven too long. Keep a close eye on them and remove them just as the edges start to set.
- Reduce Baking Powder: If you’re using a recipe that calls for a significant amount of baking powder, consider reducing it. Too much can create a light, cake-like texture instead of the desired chewiness.
- Consider the Ratio of Ingredients: Ensure you are using a balanced ratio of flour to wet ingredients. A higher fat content usually helps create denser cookies.
Can I Freeze Red Velvet Cookie Dough?
Yes, absolutely! Freezing red velvet cookie dough is a great way to have fresh cookies on hand. Here’s how you can do it:
- Portion: Scoop the dough into individual balls before freezing. This makes it easier to bake just the amount you need later.
- Wrap: Place the dough balls in an airtight container or wrap them tightly in plastic wrap to prevent freezer burn.
- Thaw: When you’re ready to bake, let the dough sit at room temperature for about 15-20 minutes before placing it in the oven.
What’s the Best Way to Store Leftover Cookies?
To keep your red velvet cookies soft and delicious, try these storage tips:
- Airtight Container: Store cookies in an airtight container to maintain moisture. Add a slice of bread to absorb moisture and keep them soft!
- Refrigeration: For an even longer shelf life, consider refrigerating them. Just make sure they’re covered to prevent them from absorbing any odors.
- Freezing for Long-Term: If you have leftovers from a cookie swap or holiday gathering, freezing them is a fantastic option. Be sure to layer parchment paper between cookies to avoid sticking.
For further information, you can check out sources like The Kitchn and Serious Eats for baking tips and techniques. Happy baking!
Conclusion on Red Velvet Cookies
Why Baking Red Velvet Cookies is Worth It for Your Homemade Food Journey
Baking red velvet cookies is more than just a treat; it’s a delightful experience that brings a touch of joy to any occasion. These cookies combine the rich flavor of chocolate with a beautiful red hue, making them visually stunning and delicious. The process of creating them allows you to explore your culinary skills, and the aroma wafting through your kitchen is simply irresistible.
Plus, when you share these cookies with friends or family, you’re not just offering a snack—you’re sharing a moment, a memory. So next time you think about what to bake, consider making these decadent red velvet cookies; they’re not just a recipe but a sweet journey in your homemade food adventure. For more baking tips, check out resources like The Spruce Eats or BBC Good Food.
PrintRed Velvet Cookies: The Best Easy Treat for Your Sweet Tooth
Deliciously soft and chewy red velvet cookies that are perfect for satisfying your sweet tooth.
- Prep Time: 15 minutes
- Cook Time: 12 minutes
- Total Time: 27 minutes
- Yield: 24 cookies
- Category: Dessert
- Method: Baking
- Cuisine: American
- Diet: Vegetarian
Ingredients
- 2 cups all-purpose flour
- 1 tablespoon cocoa powder
- 1 teaspoon baking soda
- 1/2 teaspoon salt
- 1 cup unsalted butter, softened
- 1 cup granulated sugar
- 1 cup brown sugar, packed
- 2 large eggs
- 2 teaspoons vanilla extract
- 1 tablespoon red food coloring
- 1 cup white chocolate chips
Instructions
- Preheat your oven to 350°F (175°C).
- In a bowl, whisk together the flour, cocoa powder, baking soda, and salt.
- In a separate bowl, cream the butter, granulated sugar, and brown sugar until fluffy.
- Add the eggs and vanilla extract, and mix until combined.
- Stir in the red food coloring until fully incorporated.
- Gradually add the dry ingredients to the wet mixture, mixing until just combined.
- Fold in the white chocolate chips.
- Drop tablespoon-sized amounts of dough onto a baking sheet.
- Bake for 10-12 minutes, or until the edges are set.
- Let cool on the baking sheet for a few minutes before transferring to a wire rack.
Notes
- For a minty twist, try adding mint extract to the dough.
- Chilling the dough for 30 minutes can enhance flavor and texture.
Nutrition
- Serving Size: 1 cookie
- Calories: 150
- Sugar: 10g
- Sodium: 100mg
- Fat: 7g
- Saturated Fat: 4g
- Unsaturated Fat: 2g
- Trans Fat: 0g
- Carbohydrates: 20g
- Fiber: 1g
- Protein: 2g
- Cholesterol: 30mg


")